1-27. INTRODUCTION
a. After a surgical case, the outer part of the gown and gloves are considered contaminated by bacteria from the procedure. The scrub must remove them being very careful to avoid contamination of his forearms, clothing, and hands.
b. Remove the gloves after removing the gown.
c. Follow local policy for removing the gown and gloves when they become contaminated during a surgical procedure.

1-28. PROCEDURE

a. After the circulator unties the neck and back ties, the team members perform the following procedure by themselves. Grasp the gown at the shoulders and pull the gown forward and down over the arms and gloved hands.
Figure 1-41
b. Holding the arms away from the body (see Figure 1-41), fold the gown so that the outside of the gown is folded in (see Figure 1-42); discard it into the linen hamper.
Figure 1-42
c. Grasp the outer surface of one glove with the other gloved hand "rubber to rubber" (see Figure 1-43) and pull off the glove. Discard the glove into the designated receptacle.
Figure 1-43
d. Place the fingers inside the cuff of the glove "skin to skin" (see Figure 1-44); discard the glove.
Figure 1-44
e. After exiting the "sterile area," remove the mask and discard it into the proper receptacle.  

1-25. INTRODUCTION
After having donned his own sterile gown and gloves, the scrub will assist other members of the sterile team into their gowns and gloves. Other members of the "sterile" team include the surgeon and his medical officer assistants, as well as other operating room specialists assigned to scrub.

1-26. PROCEDURE
a. Unfold a towel so that it is folded in half lengthwise and hand it to the scrubbed team member. While he is drying his hands, unfold his gown.

Grasp the gown near the neckband using the thumb and index finger of each hand and roll the gown so that the outside surface is over (protecting) your gloved hands (see Figure 1-35). The arm holes of the gown are facing the team member being gowned. Offer the inside of the gown to the scrubbed team member and allow him to slip his arms into the gown sleeves (see Figure 1-35).
Figure 1-35
b. The scrub pulls the gown over the team member's shoulders (see Figure 1-36). The circulator then secures the neck of the gown and ties the inside waist tie.
Figure 1-36
c. Grasp the right glove firmly at waist level. Keeping your thumbs extended and covered by the glove cuff, stretch the cuff so that he can introduce his hand without touching your gloves (see Figure 1-37).
1 Assisting the team member in donning the first glove. Note that the scrub has spread the cuff wide to permit the team member to introduce his hand without touching the scrub's gloves.
2 Note also that the scrub protects his gloved fingers by holding them beneath the cuff of the glove, and his thumbs by holding them away from the partly-gloved hand.

Figure 1-37.1

Figure 1-37.2
While you are stretching the glove open, stand with one foot forward and one foot to the rear (see Figure 1-38). This stance will help you from being thrown off balance. (DO NOT snap the glove; bring it upward gently over the cuff of the gown.) NOTE: Always offer the right glove first. Be careful that you do not get thrown off balance while the other team member introduces his hand into the glove (see Figure 1-38).


Figure 1-38
d. Repeat the technique described in paragraph c above for the left hand. The team member can assist with donning this glove (see Figure 1-39). Give the team member a moistened saline sponge so that he can remove excess powder from his gloves if the gloves are powdered. NOTE: The scrub should remove the powder from his gloves again.

Figure 1-39
e. The circulator will readjust the neck fastener if needed and assist scrubbed team member with tying the outside waist tie of the gown. After the tie is secured, the gown is adjusted at the bottom (see Figure 1-34). Figure 1-40 shows a gloved and gowned team member.
Figure 1-40

1-22. INTRODUCTION
Now that the gloves are on, the team member is ready to complete gown tie with assistance of the circulator. The powder from the gloves is washed off before the gown's waist tie is tied and final adjustment is made in accordance with local SOP.

1-23. PROCEDURE
a. The scrub will take hold of the paper tab that holds the belt and belt tie located at waist level (see Figure 1-28) and pull the tab away from the belt tie.
Figure 1-21
b. The scrub will pass the paper tab that holds the belt to the circulator (see Figure 1-29).
c. The circulator will take hold of the paper tab, being very careful not to touch the belt, and will move to the side or behind the scrub (see Figure 1-30).
d. When the circulator is properly positioned (to the side or behind the scrub), the scrub will then take hold of the belt only being careful not to touch the paper tab and pull on the belt leaving the circulator with only the paper tab in his hand (see Figure 1-31).  NOTE: The circulator must hold on tight to the paper tab so that when the scrub pulls on the belt the tab doesn't come with the belt and contaminates the scrub.
e. Now the scrub will take hold of the belt tie that is at waist level and tie the belt to it (see Figures 1-32 and 1-33).
1-24. ADJUSTMENT OF GOWN Now that the gloves are on and final tie of the gown is done, the circulator completes his adjustment of the gown by stooping down, grasping the outside of the side seams at the bottom of the gown, and gently pulling down (see Figure 1-34) in accordance with local SOP.

1-20. INTRODUCTION

a. Gloves are packaged so that the scrub may don his gloves without contaminating the glove's outer surfaces. A pair of gloves are packaged in an individual sterile wrapper.
b. While the specialist is wearing his sterile gown and gloves, he must take particular care to avoid contaminating these sterile garments because such contamination could possibly result in the transfer of pathogenic microorganisms to the patient's wound. The specialist should therefore observe certain rules, to include the rules outlined Table 1-2.
Table 1-2. Rules to observe while wearing sterile gown and gloves.
NEVER
drop his hands below the level of the sterile area at which he is working.
NEVER
touch his surgical gown above the level of the axilla or below the level of the sterile area where he is working.
NEVER
put his hands behind his back; he must keep them within his full view at all times.
NEVER
tuck his gloved hands under his armpits, as the axillary region of his gown is contaminated.
NEVER
reach across an unsterile area for an item.
NEVER
touch an unsterile object with gloved hands unless ordered to do so by the surgeon.
NOTE: The surgeon will not give such an order as to allow someone to touch an unsterile object with gloved hands unless a dire emergency exists (such as cardiac arrest) when the time element is of paramount importance in saving the patient's life.
NOTE: If the scrub contaminates his gown and gloves in any of the ways just mentioned in Table 1-2, he needs to discard and replace his gown and gloves.

1-21. CLOSED CUFF METHOD

a. Discussion. The closed cuff method of gloving is preferable to the open cuff method when the specialist must glove himself. The closed cuff method eliminates potential hazards in the glove procedure as follows:
(1) The danger of contamination of gloves caused by the glove cuffs rolling on skin is eliminated because the skin surface is not exposed.

(2) The gown cuffs can be anchored securely by the gloves without the danger of contamination that exists when gloves are donned by the open cuff method.
b. Procedure.
(1) Take a tuck in each gown cuff if the cuffs are loose. Make the tuck by manipulating the fingers inside the gown sleeve; do not expose the bare hands while tucking the gown cuffs. (2) The circulator opens the outer wrapper of the glove package and flips them onto the sterile field.
(3) Open the inner package containing the gloves and pick up one glove by the folded cuff edge with the sleeve-covered hand (see Figure 1-21).
Figure 1-21
(4) Place the glove on the opposite gown sleeve, palm down, with the glove fingers pointing toward your shoulder (see Figure 1-22). The palm of your hand inside the gown sleeve must be facing upward toward the palm of the glove.
Figure 1-22
(5) Place the glove's rolled cuff edge at the seam that connects the sleeve to the gown cuff (see Figure 1-23). Grasp the bottom rolled cuff edge of the glove with your thumb and index finger.
Figure 1-23
(6) While holding the glove's cuff edge with one hand, grasp the uppermost edge of the glove's cuff with the opposite hand (see Figure 1-24). Take care not to expose the bare fingers while doing this.
Figure 1-24
(7) Continuing to grasp the glove (see Figure 1-24); stretch the cuff of the glove over the hand (see Figure 1-25).
Figure 1-25
(8) Using the opposite sleeve- covered hand, grasp both the glove cuff and sleeve cuff seam and pull the glove onto the hand (see Figure 1-26). Pull any excessive amount of gown sleeve from underneath the cuff of the glove.
Figure 1-26
(9) Using the hand that is now gloved, put on the second glove in the same manner. When gloving is completed, no part of the skin has touched the outside surface of the gloves. Check to make sure that each gown cuff is secured and covered completely by the cuff of the glove (see Figure 1-27). Adjust the fingers of the glove as necessary so that they fit snugly.
Figure 1-27
 NOTE: The scrub should don the first glove in accordance with the hand he uses most of the time, i.e., a right-handed specialist can perform the closed cuff gloving procedure more quickly and efficiently by putting on the left glove first. A left-handed specialist will facilitate the procedure for himself by putting on the right glove first.

1-17. PRINCIPLES
The specialist is to abide by the following principles whenever he dons a sterile gown:

a. If the specialist touches the outside of his gown while donning it, the gown is contaminated. If this occurs, discard the gown. The specialist is to touch only the inside of the gown while putting it on.
NOTE: Surgical gowns are folded with the inside facing the specialist. This method of folding facilitates picking up and donning the gown without touching the outside surface.
b. The specialist's scrubbed hands and arms are contaminated if he allows them to fall below waist level or to touch his body. The specialist, therefore, keeps his hands and arms above his waist and away from his body and at an angle of about 20 to 30 degrees above the elbows.
c. After donning the surgical gown, the only parts of the gown that are considered sterile are the sleeves (except for the axillary area) and the front from waist level to a few inches below the neck opening. If the gown is touched or brushed by an unsterile object, the gown is then considered contaminated. The contaminated gown is removed using the proper technique. You must then don a new sterile gown.
1-18. PROCEDURE--CLOSED CUFF METHOD
a. With one hand, pick up the entire folded gown from the wrapper by grasping the gown through all layers, being careful to touch only the inside top layer, which is exposed (see Figure 1-15). Step back from the table to allow other team members room to maneuver.
Figure 1-15
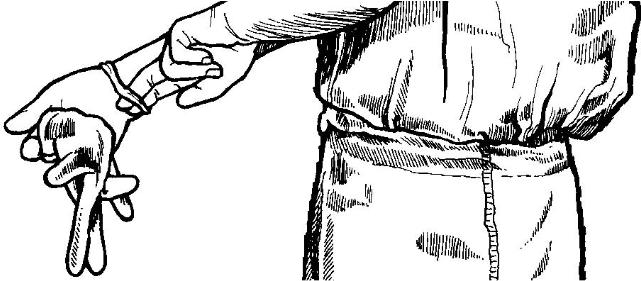
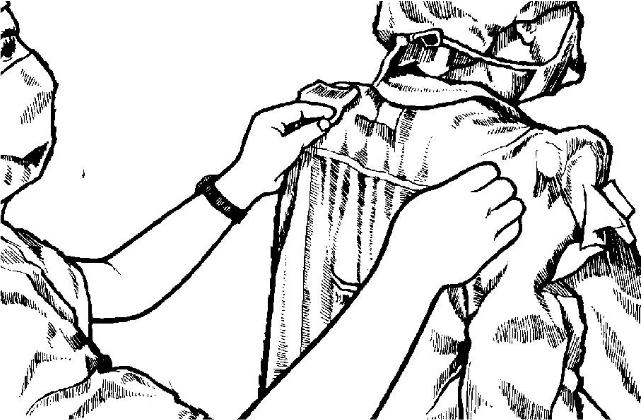
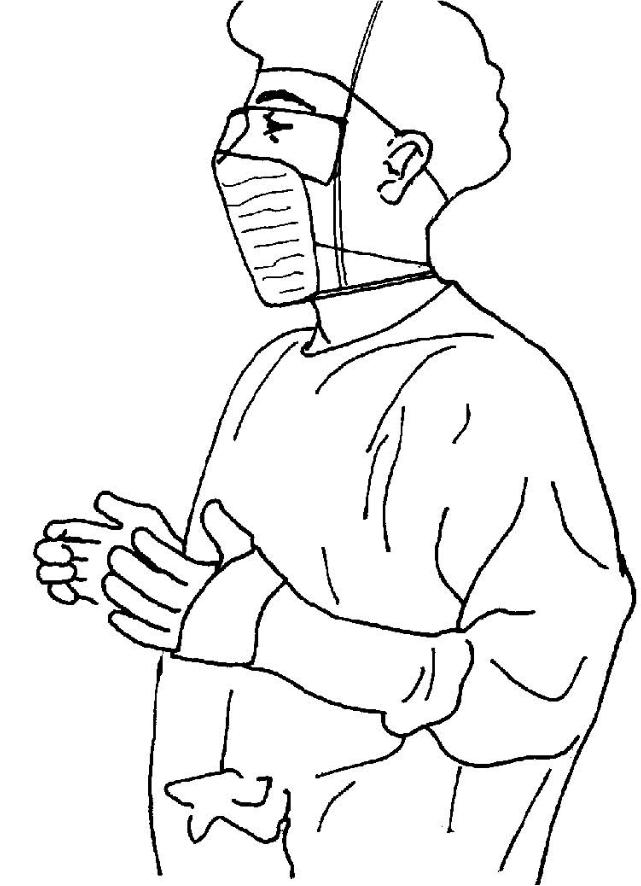
b. Hold the gown in the manner shown in Figure 1-16, near the gown's neck, and allow it to unfold, being careful that it does not touch either your body or other unsterile objects. c. Grasp the inside shoulder seams and open the gown with the armholes facing you.

Figure 1-16
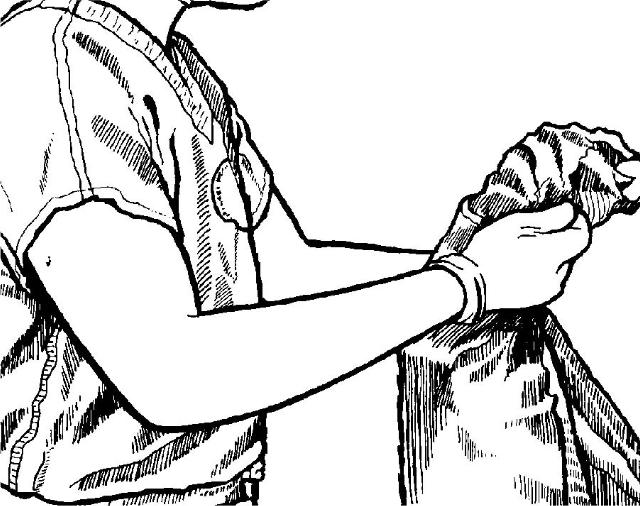
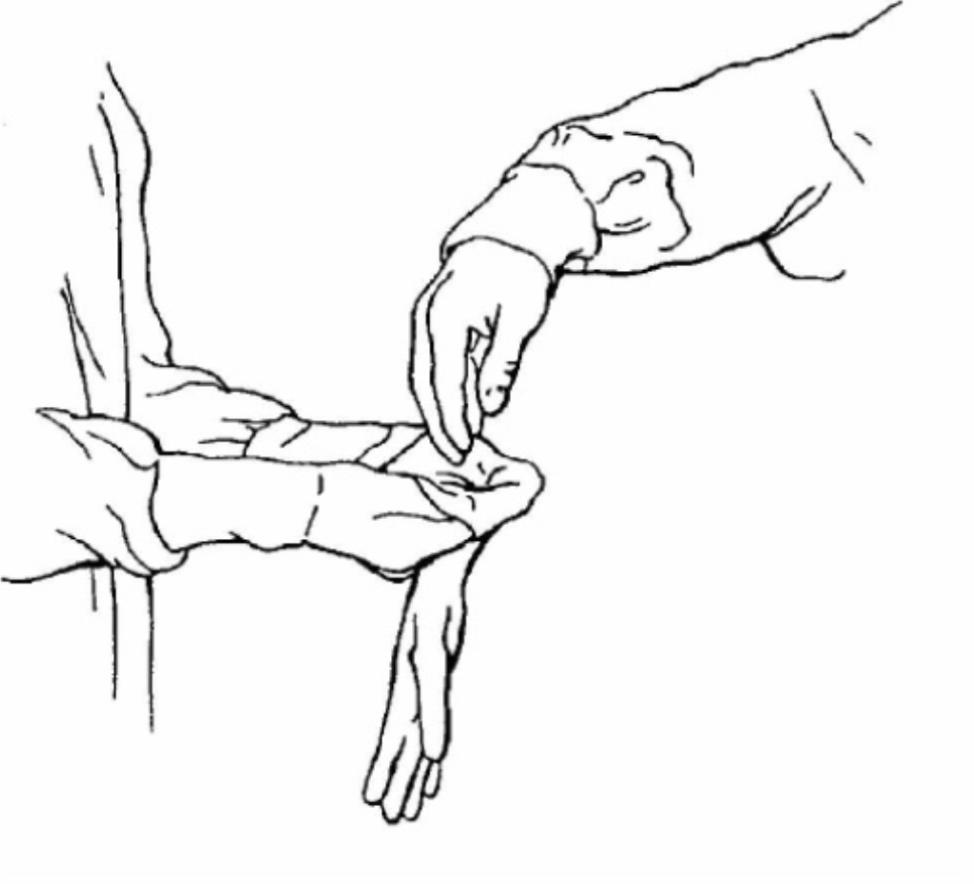
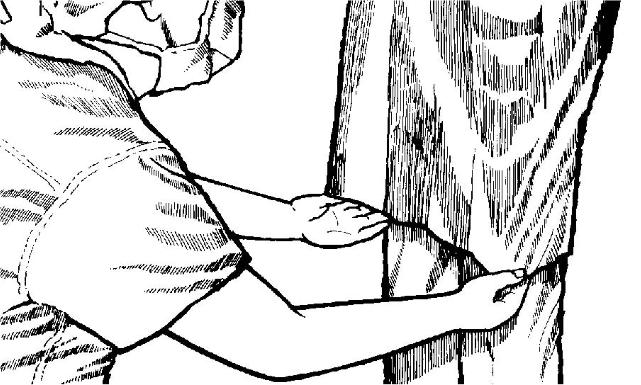
d. Slide your arms part way into the sleeves of the gown, keeping your hands at shoulder level away from the body (see Figure 1-17).
Figure 1-17
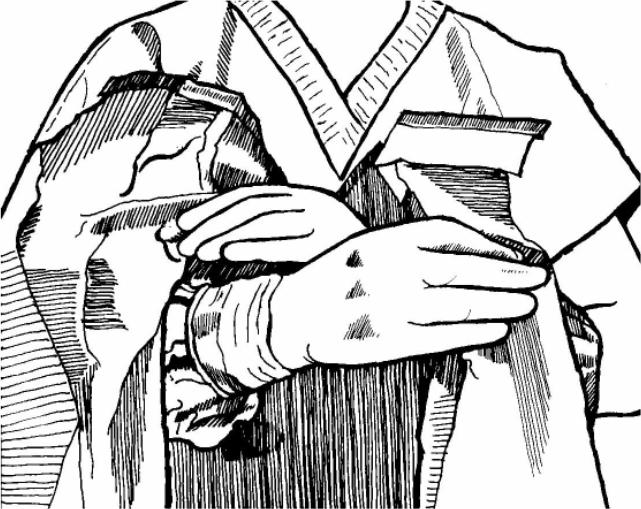
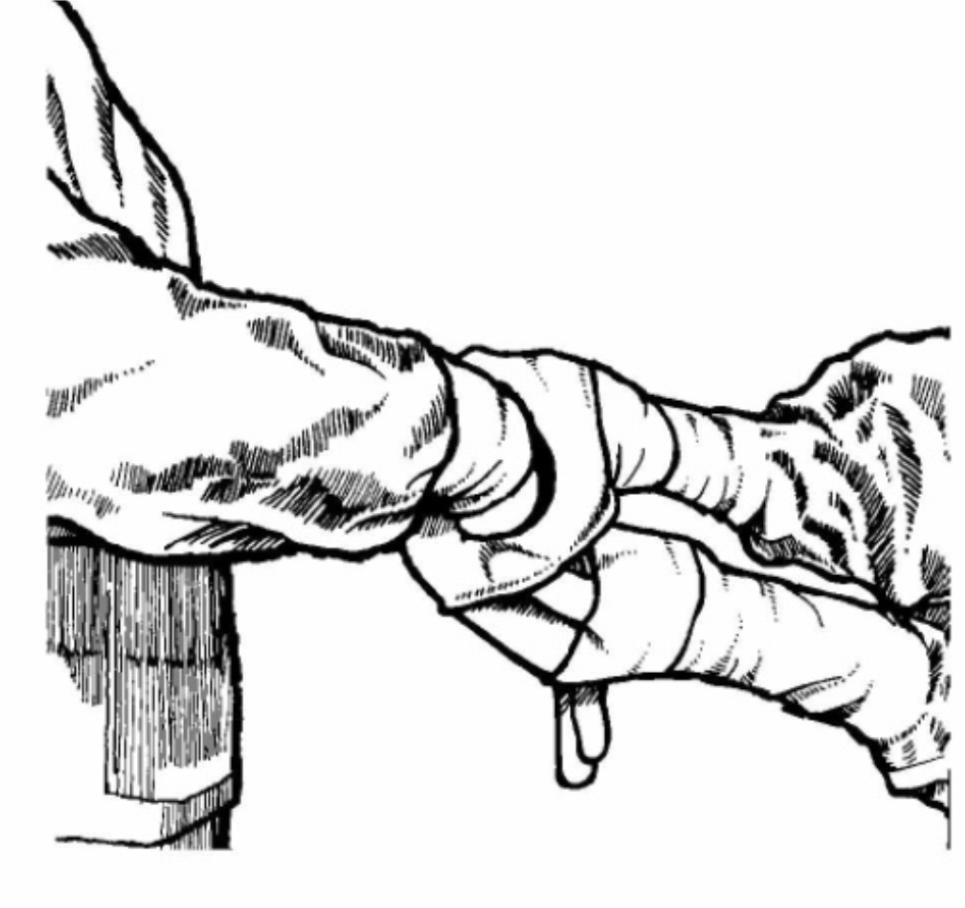
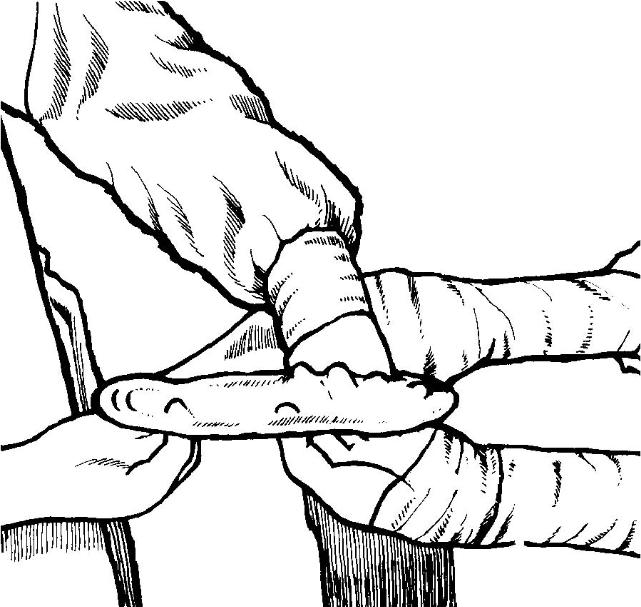
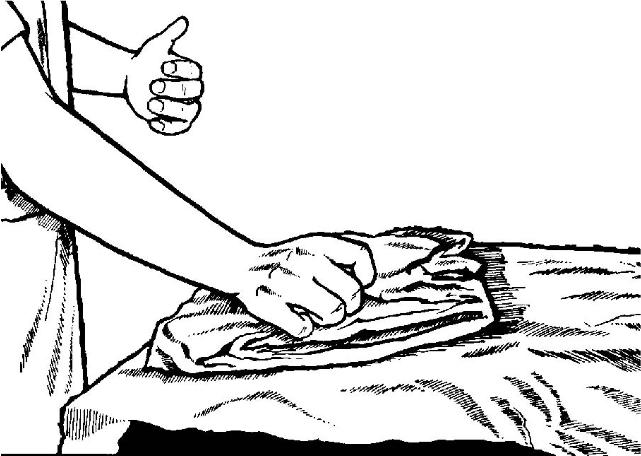
e. With the assistance of your circulator, slide your arms further into the gown sleeves; when your fingertips are even with the proximal edge of the cuff, grasp the inside seam at the juncture of gown sleeve and cuff using your thumb and index finger. Be careful that no part of your hand protrudes from the sleeve cuff (see Figure 1-18).
Figure 1-18
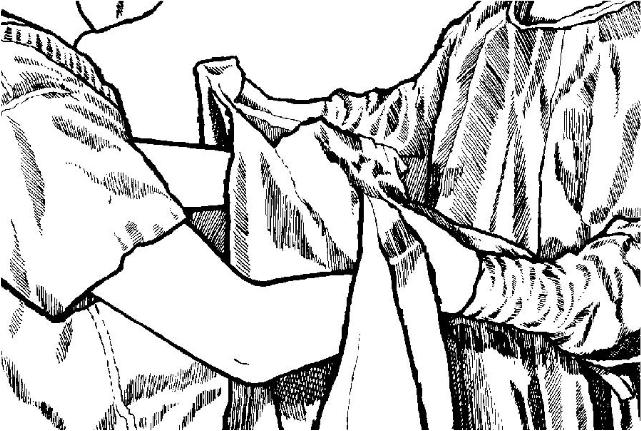
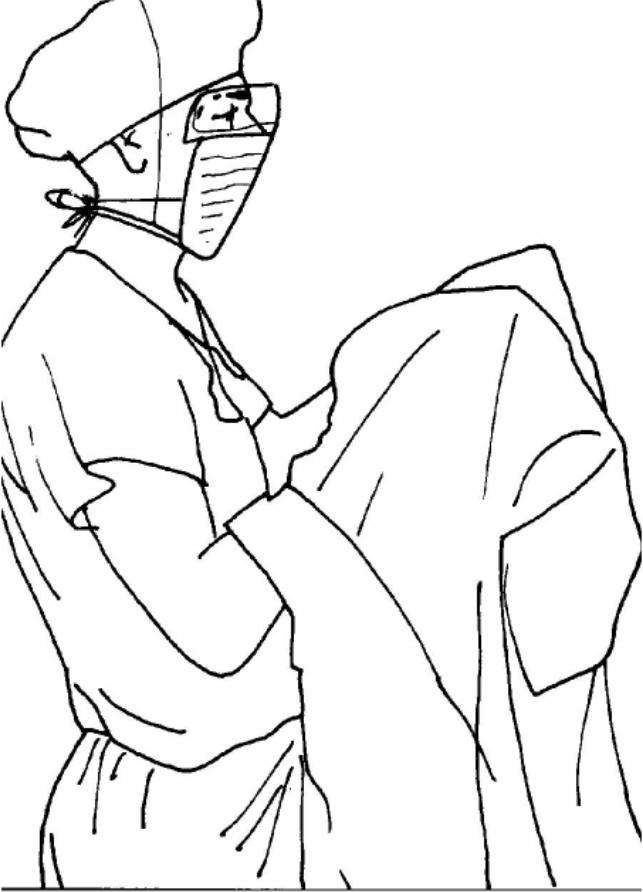
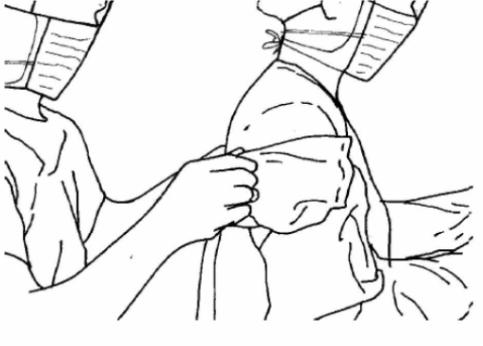
f. The circulator must continue to assist at this point. He positions the gown over your shoulders (see Figure 1-19) by grasping the inside surface of the gown at the shoulder seams.
1. The Circulator adjusts the gown over the Scrub's shoulders.
2. Note that the Circulator's hands are in contact with only the inside surface of the gown.

Figure 1-19.1

Figure 1-19.2
NOTE: For the reusable cloth gown (which is rarely used), use the procedures given in steps a through f. The circulator then prepares to tie the gown. The neck and back ties are tied in an up-and-down motion. He then ties the belt by grasping the gown at the back as the scrub leans forward. The circulator leans down and grasps the distal end of one belt tie; this enables the circulator to handle the belt without touching any part of the gown that should remain sterile. The circulator then brings the belt tie to the back of the gown. The scrub then swings toward the opposite side so that the circulator can grasp the other belt in the same manner. The circulator will then tie the belt in an up-and-down motion; this reduces the area of contamination on the gown. The circulator will then tuck the ends of the belt inside the gown at the back. Then the scrub; proceeds to the gloving procedure.
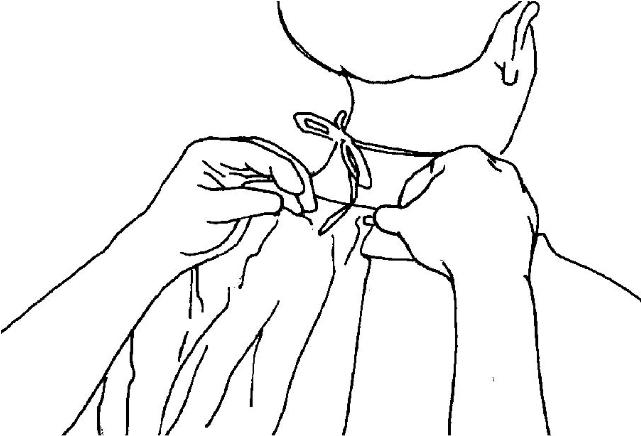
g. The circulator then prepares to secure the gown. The neck and back may be secured with a Velcro® tab or ties (see Figure 1-20). The circulator then ties the gown at waist level at the back. This technique prevents the contaminated surfaces at the back of the gown from coming into contact with the front of the gown.
Figure 1-20

1-19. PROCEDURE--OPEN CUFF METHOD

The procedure is the same as that for the closed cuff method with the exception of the steps described in paragraph 1-18e and in Figures 1-18 and 1-19.
a. Do not grasp the inside seam of the sleeve as described in paragraph 118e and shown in Figure 1-19. Allow your hands to protrude from the cuffs of the gown.
b.The circulator reaches inside the gown sleeves at the shoulder seams and pulls the gown over your shoulders and the cuffs over your hands instead of performing this step of the procedure as described in paragraph 1-18f and Figure 1-19. Both you and the circulator must be careful that the gown cuffs are not pulled too high on the wrists. The edge of the cuff should be at the distal end of the wrist.
NOTE: The scrub will proceed to the Glove Technique before completing final tie of gown.